Summary
- The easiest way to install Android Beta on Pixel is by enrolling your device via Google’s Beta Program website.
- For more control, you can use Android Flash Tool to install specific Android beta builds manually.
- Using the Android Flash Tool to install a beta build will wipe your Pixel phone and remove all data.
Notes
Enrolling and updating to a Beta build via Google's official Android Beta website won't wipe your data. However, the Android Flash Tool method does wipe your data because it involves unlocking the bootloader. It's important to note that going back from beta to a stable build using the Android Flash Tool will always reset your device.
Google Pixel smartphones are usually the first smartphones to receive major Android updates. Not only that, but Google pushes Betas and Quarterly Platform Releases for users to try out new features before they make it to stable releases. Therefore, if you want to install Android Beta on your Pixel phone and don't know where to start, here's how to do it.
There are multiple ways to install Android Beta builds on Pixel phones. The easiest way is to enrol your Pixel into the Beta program via Google's official Android Beta website. Alternatively, you can use the Android Flash Tool, a website that does all the heavy lifting for you. You can install the Beta builds manually by using the Android Debugging Bridge, which is a bit complex; so we're avoiding it altogether.
How to Install Android Beta on Pixel Using Google's Beta Website
If your Pixel phone is still receiving Android updates and is registered to your Google account, here's how to enrol it into Beta via Android Developer Program.
- Head over to the official Android Beta Program website and click on View your eligible devices.
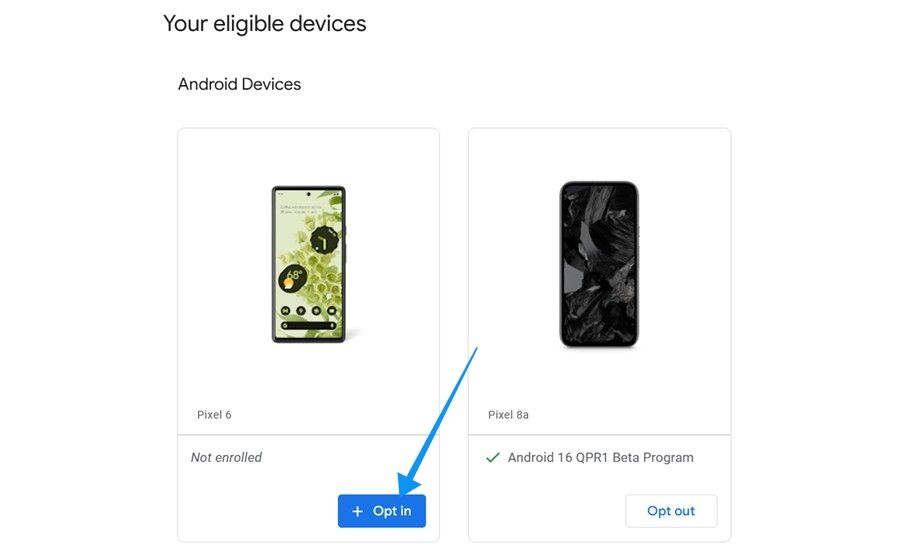
- Click on Opt in below your device's image to instantly enrol into Beta.
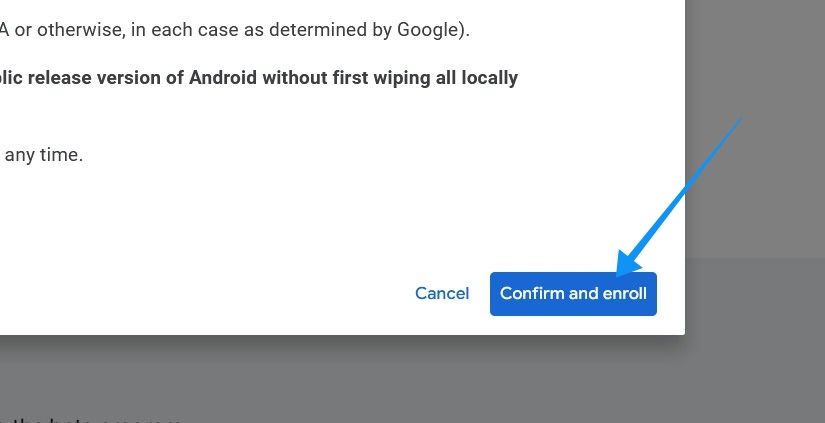
- Accept the terms and conditions and click on Confirm and enrol.
- On your Pixel phone, head over to Settings > System > Software updates and tap on Check for update.
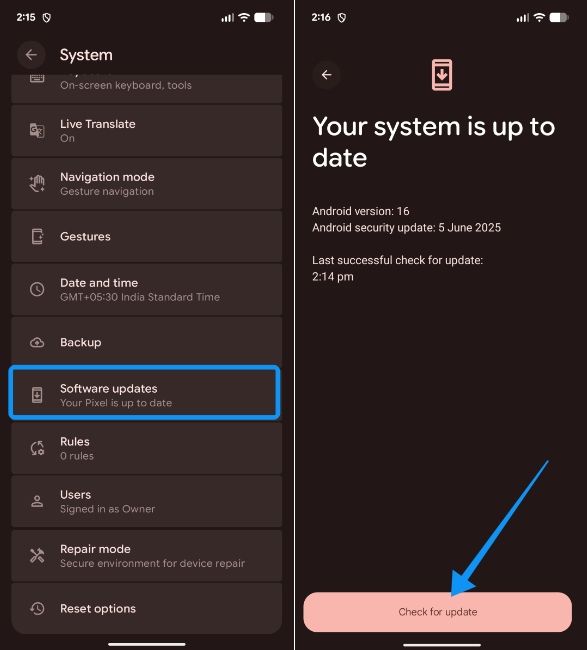
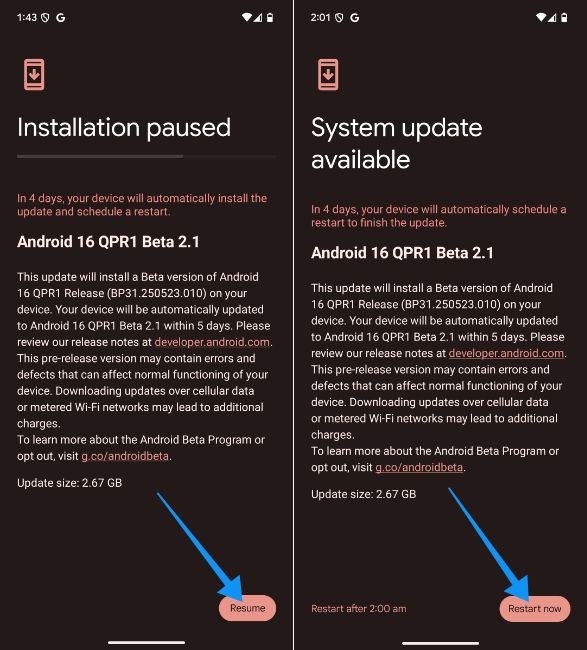
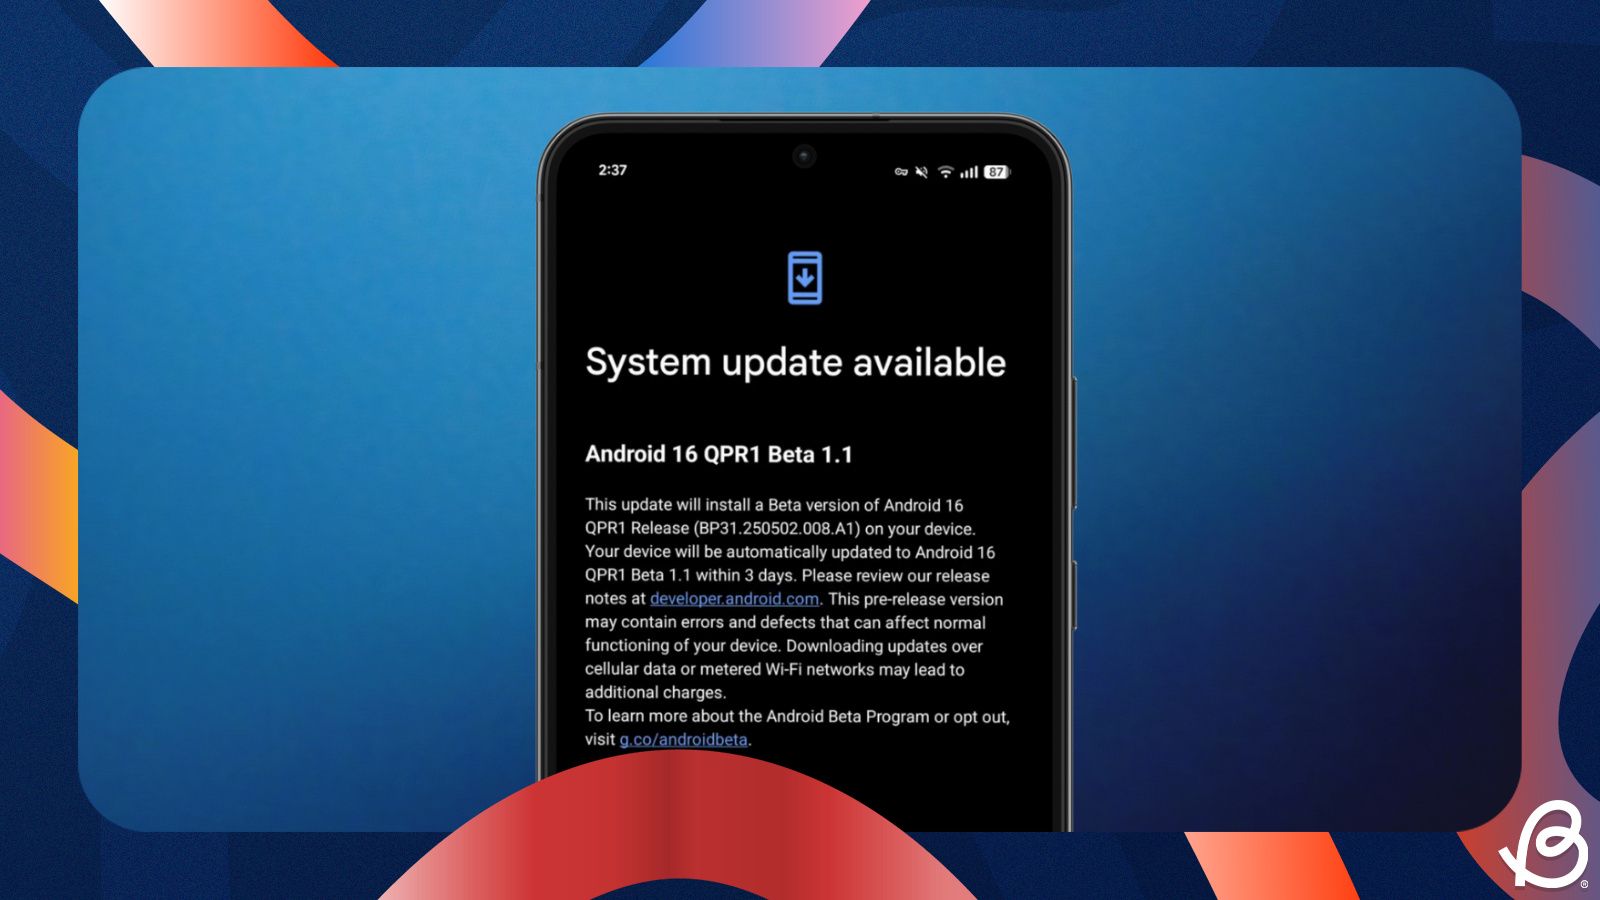
- You should receive a new Beta update. When you do, download it and tap on Restart now to update your Pixel.
How to Install Android Beta on Pixel Using Android Flash Tool
Android Flash Tool is Google's official tool to help users flash Android with ease. Using the same, you can go from Beta to Stable or vice versa, or even use it to roll back updates. All you need to do is connect your phone and enable USB debugging. It's worth noting that the tool only works on Chromium-based browsers like Google Chrome, Edge, and Brave.
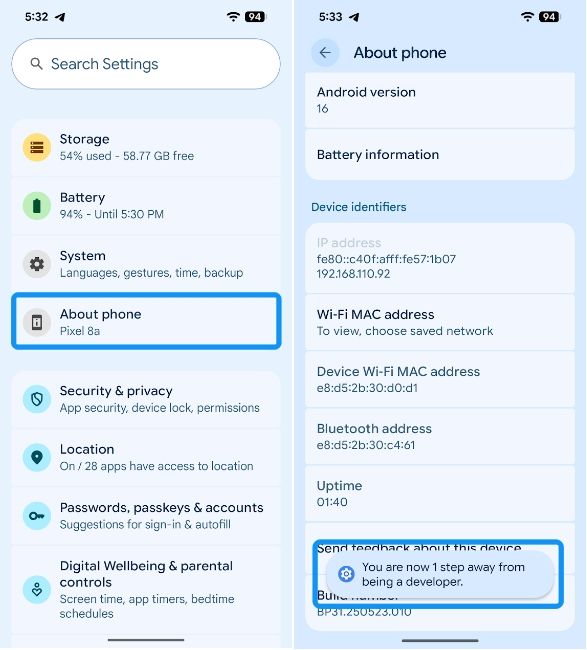
- Go to your Pixel's Setting > About Device and tap on Build number seven times before you see the “You are now a developer” toast message.
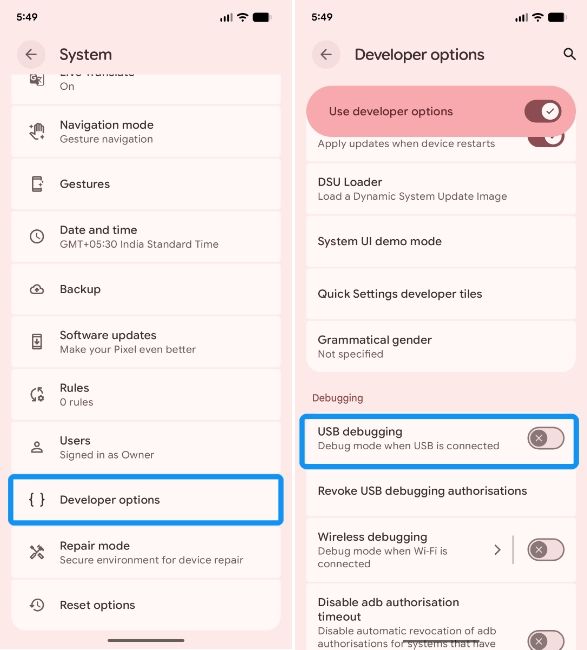
- Go back to the main Settings screen and head over System > Developer options. Here, you need to scroll down and turn on the USB debugging toggle under "Debugging".
- Connect your Pixel to your computer via a USB cable.
- Now, head over to Android Flash Tool website and click on Download Android USB Driver, when prompted.
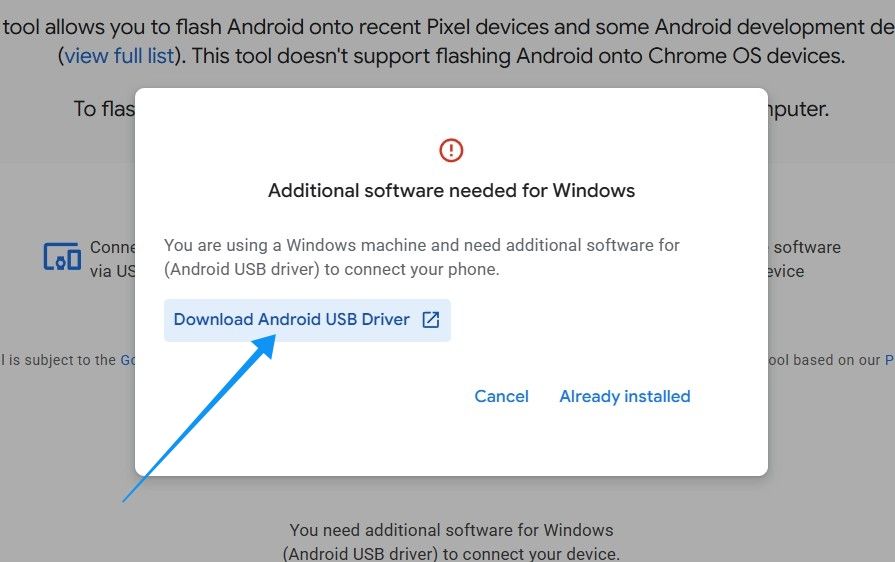
- You can proceed to the next step if you already have it installed; if not, follow the instructions inside Google's guide.
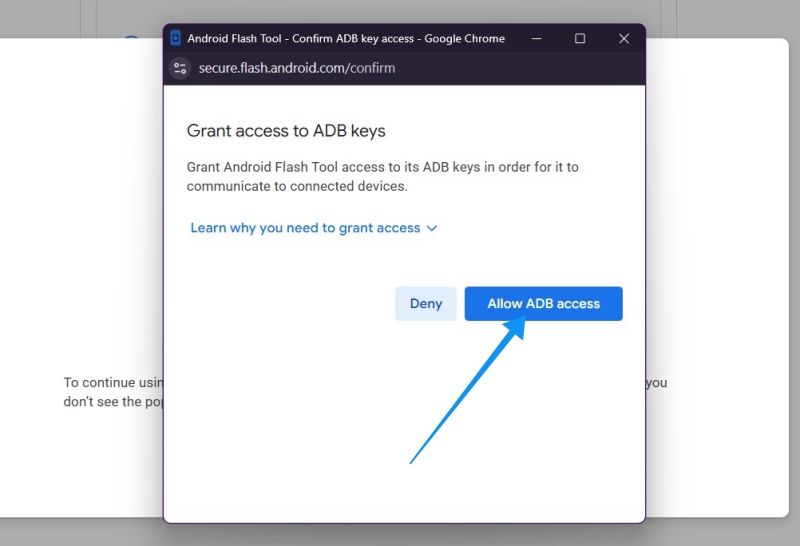
- Once installed, head back to the website and click on Allow ADB access.
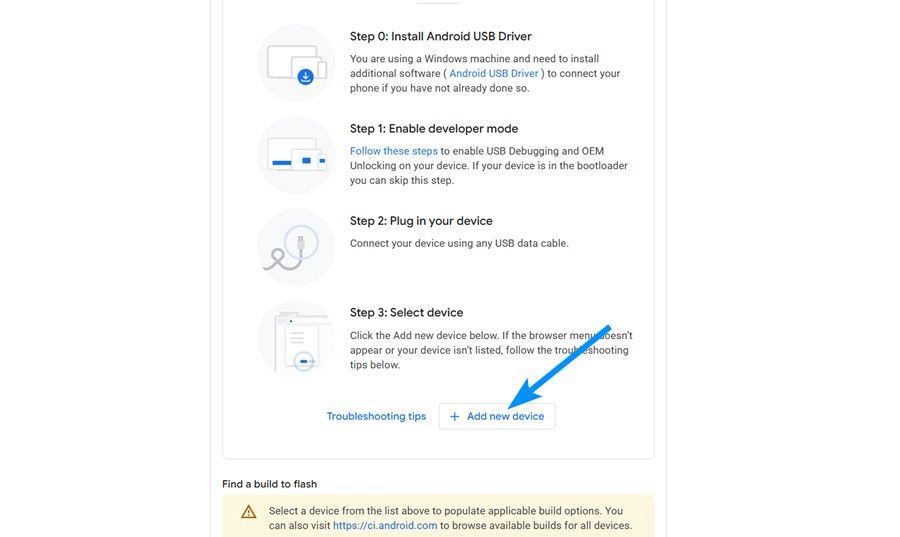
- Click on Add new device to show the list of all the connected devices.
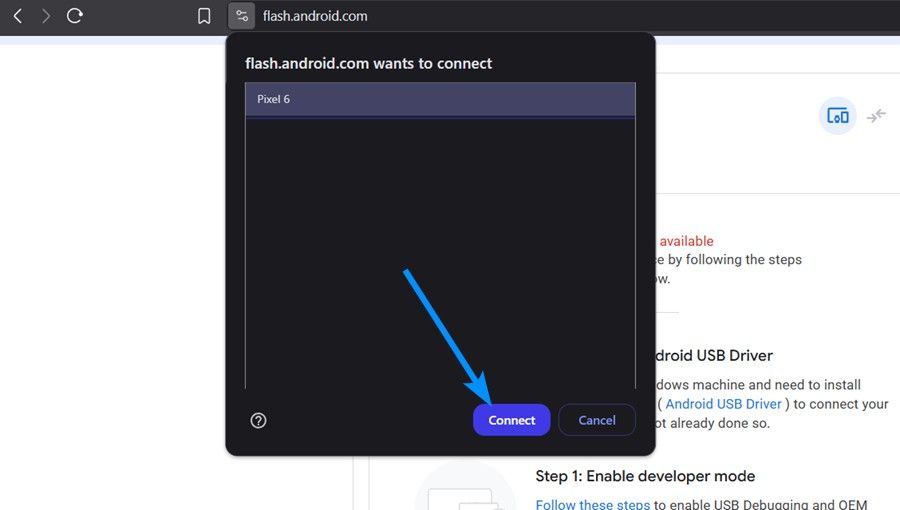
- Your Pixel device should show up in the list of devices. If not, reconnect your phone and tap on Connect when it shows up.
- A USB debugging prompt should show up on your phone. Select Always allow and tap on Allow.
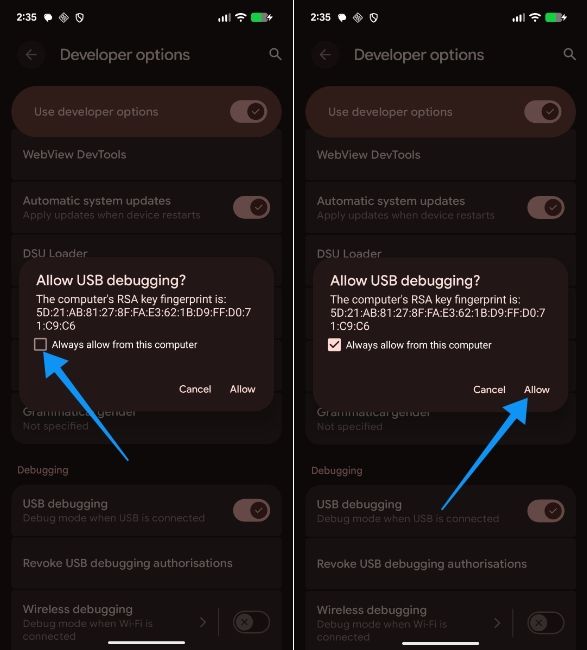
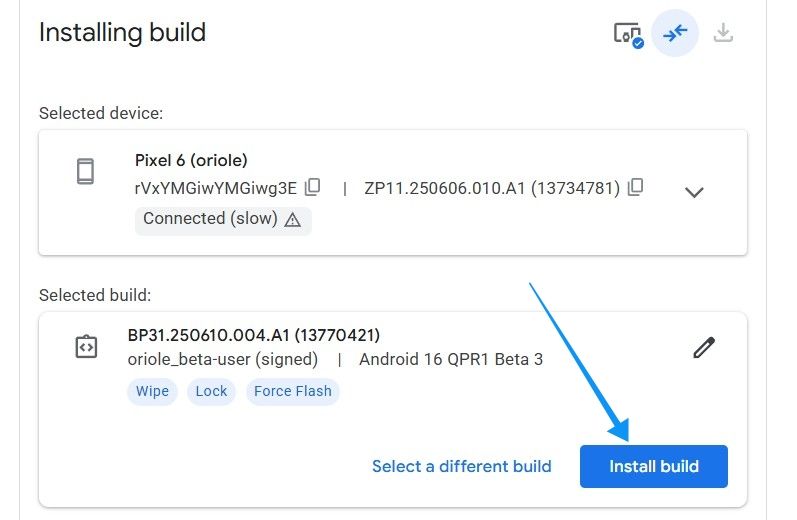
- Once connected, select the Beta build you want to install. In this case, we'll be demonstrating with Android 16 QPR1 Beta 2.1.
- Click on the Install build option under "Selected build" to start the process.
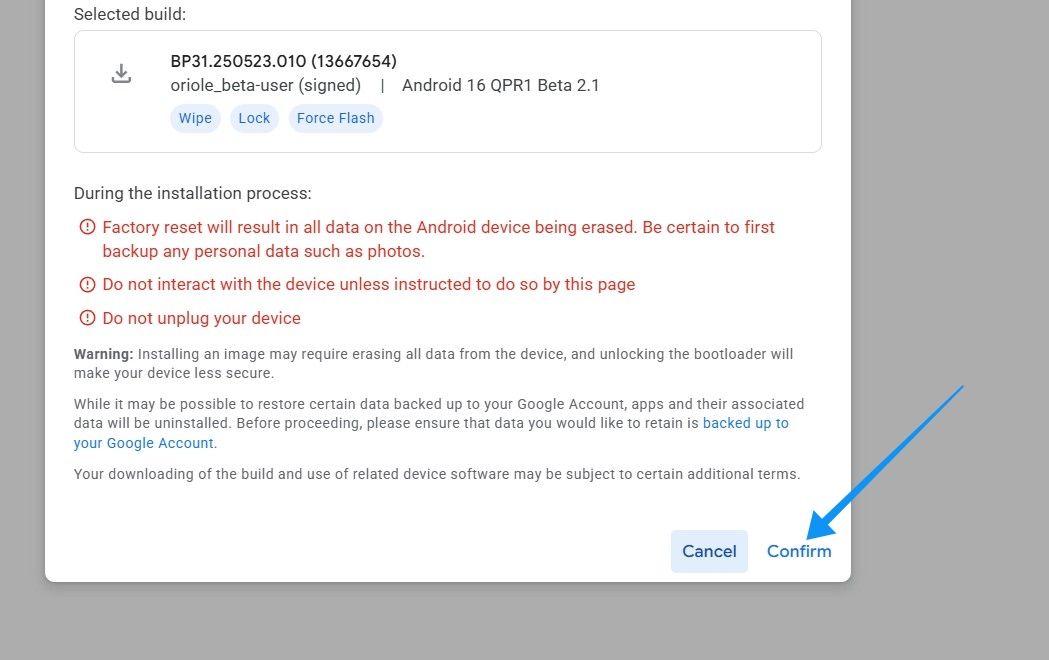
- Now, click on Confirm again for Android Flash Tool to start working.
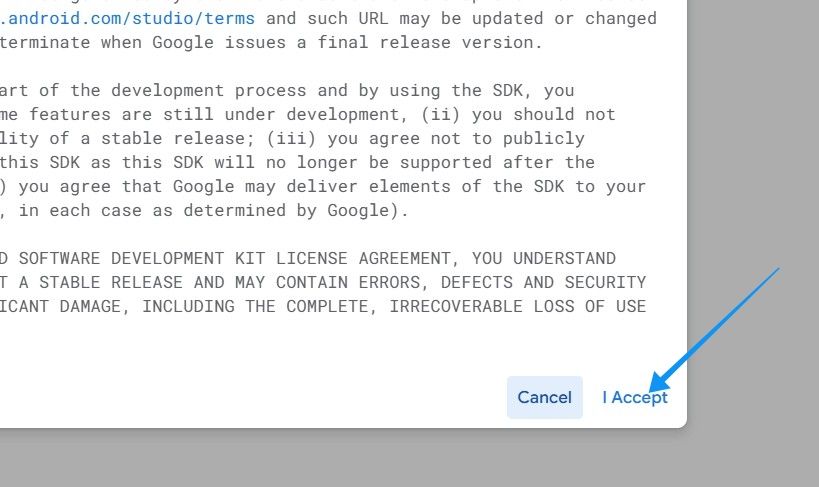
- Finally, click on I Accept when prompted.
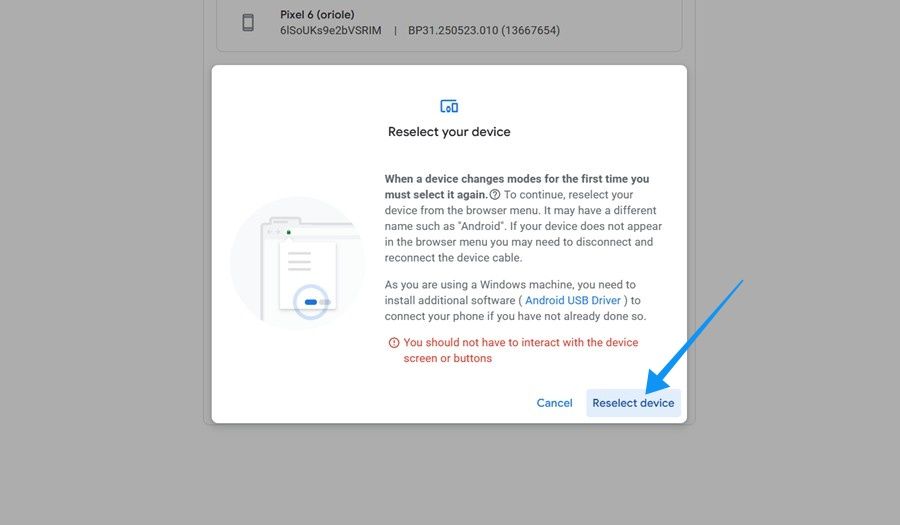
- The website should prompt you to confirm the device. Click on Reselect device.
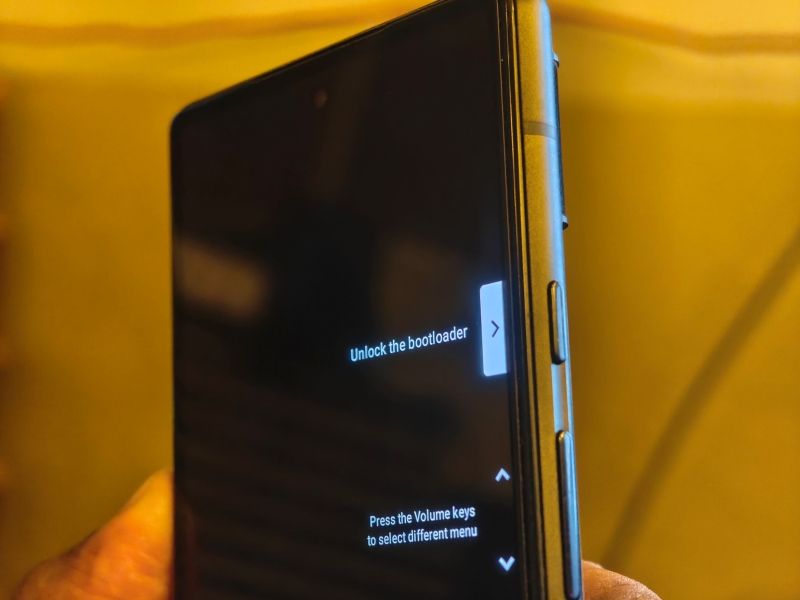
- Once done, it will prompt you to use the Volume down key and the Power button to unlock the bootloader on your Pixel.
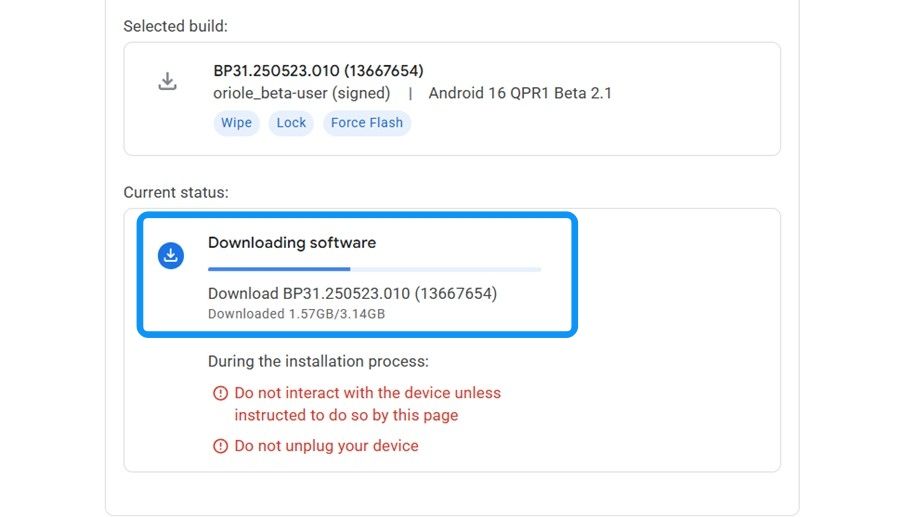
- When you unlock the bootloader, Android Flash Tool will start downloading the Beta firmware.
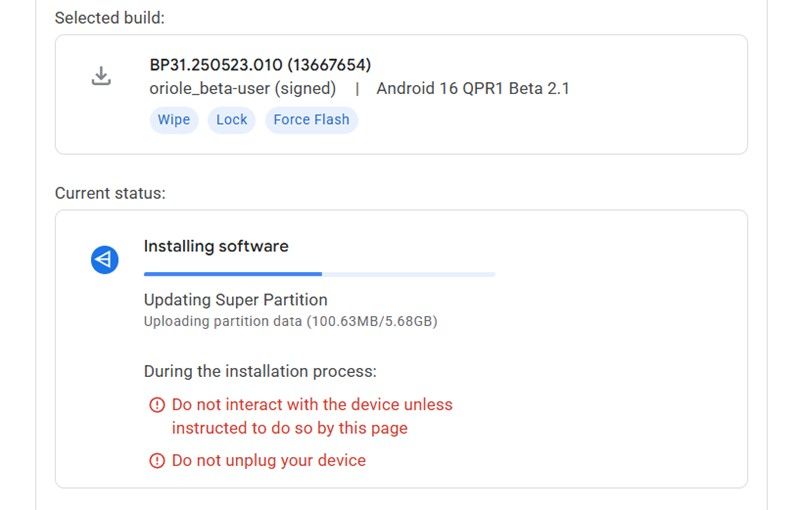
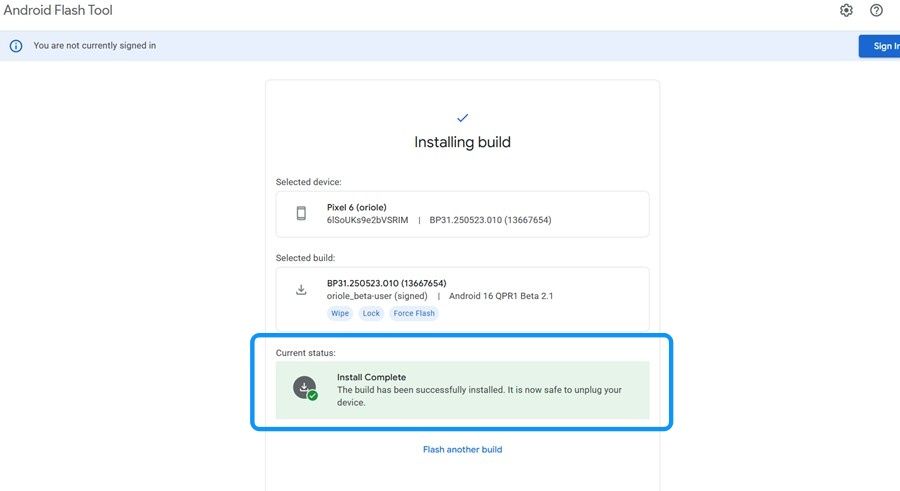
- Once downloaded, the firmware will be flashed on your Pixel phone.
- You will then be asked to lock the bootloader. Just press the Volume up key and Power button on “Lock bootloader” text.
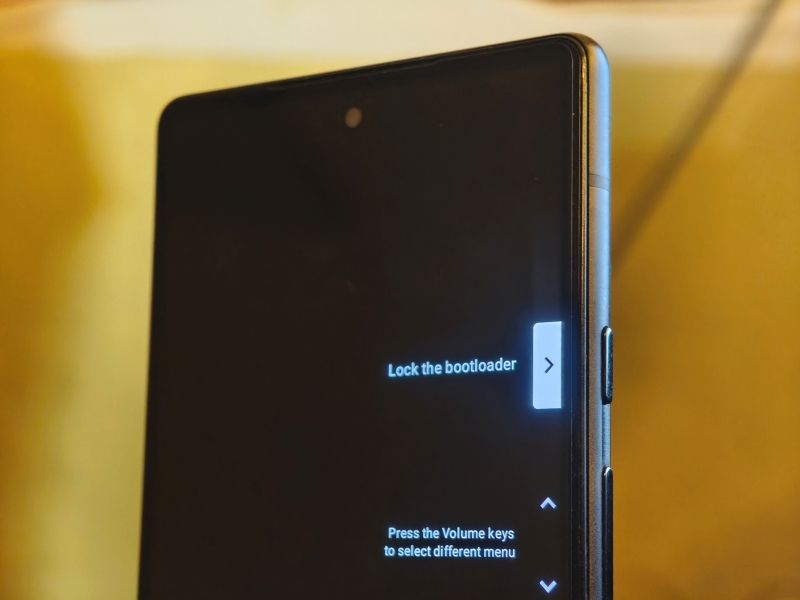
- Your Pixel should then restart into the Android Beta build.
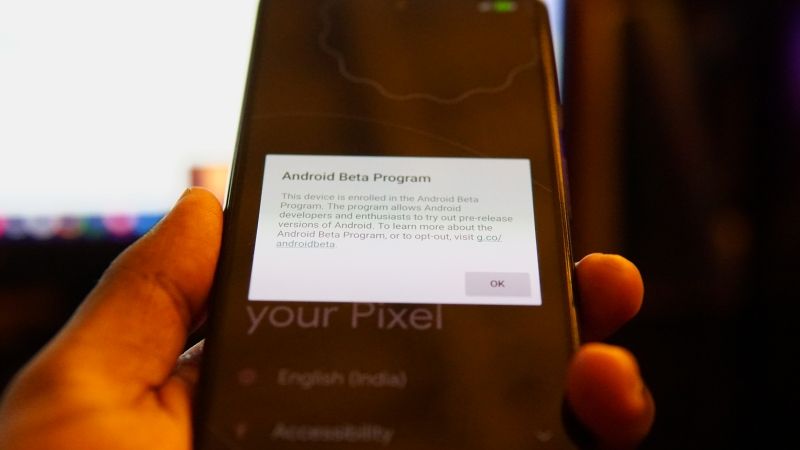
You should get an Android Beta Program popup as soon as the phone boots, indicating the Beta install was a success.
What's the Difference Between Android Beta and QPR Beta?
The main difference between Android Beta and QPR is that Android Betas are released when Google is testing out a new Android version. QPR (Quarterly Platform Releases) are released throughout the year and are a subset of Android Betas. Google pushes QPR and QPR Betas to users to test out upcoming Pixel Drops early.
Google generally pushes a couple of developer previews followed by four to five Android Betas before pushing stable. QPR releases could get three to four beta releases before Google releases a stable QPR update that usually arrives once every three months (Hence “Quarterly” PR). That said, if you want to go back from QPR to stable (say QPR1 Beta 2 to stable), you need to wait until a stable public stable update is pushed.
Besides the two main methods, there's another that involves ADB (Android Debugging Bridge) where a user needs to manually unlock the bootloader, get the factory image for their Pixel device, and flash it by passing ADB and Fastboot commands. The methods shown below are much easier and quicker for general users, and we recommend sticking to them.
Although Google claims the QPR releases are usually supposed to be stable, it's still bets software at the end of the day. If you face any major issues, you can trace your way back by following the same steps mentioned in the second method, but this time by choosing a stable firmware.
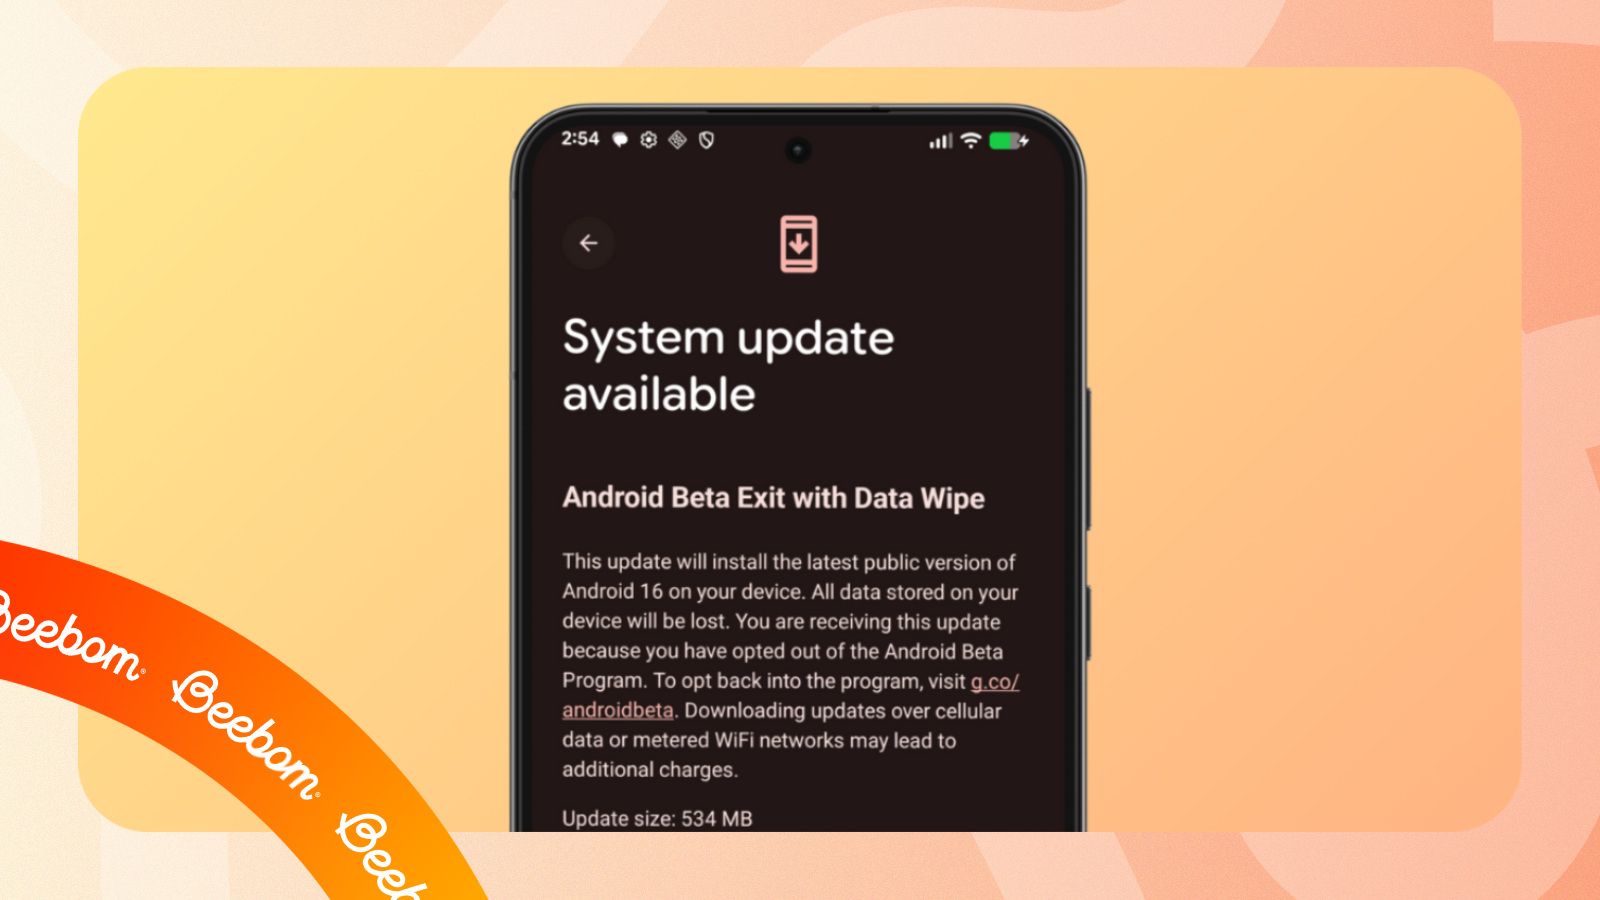
That said, we recommend backing up your data in both the cases to prevent losing important data. Moving from Beta to Stable will always reset your Pixel to factory condition, unless you opt out of Beta and wait for the next stable release, which could take 3–4 months.


.jpg)
